Create custom character
Create custom character
Let’s learn how to import your own character mesh to use with the HCharacter class.
Currently our customizable character uses a Metahuman Skeleton. Any mesh rigged in UE5 Manny or UE5 Metahuman should be instantly compatible.
However, a lot of meshes/characters are rigged to standar UE4 skeletons or even custom skeletons.
In this guide, you will learn how to use UE5 and UE4 characters. In the future, we will provide a way to add characters with any skeleton type.
📋 Requirements:
HELIX Studio Setup
Understanding Basic Concepts
📺 The written guide presents more detailed instructions but here is a quick video tutorial that covers the basics:
Setting up project and importing from Marketplace
Start by creating a new studio project from the Unreal Engine Launcher

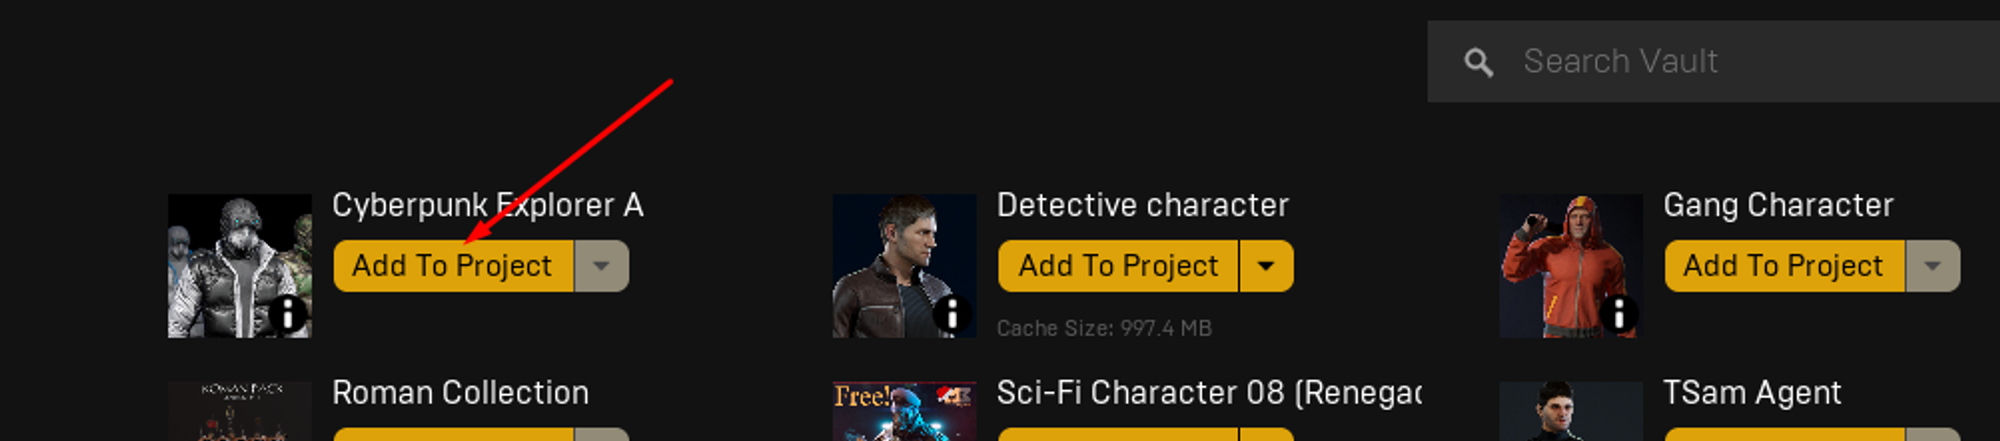
After the new project is created, import any character packs from the Unreal Marketplace
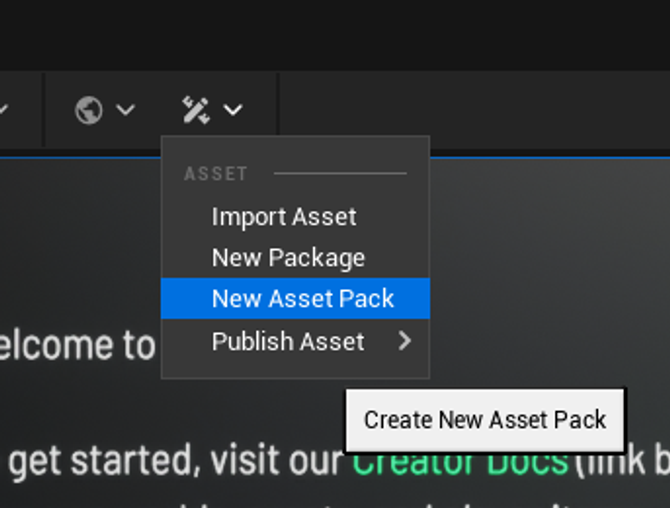
After importing, inside your new project, create a new Asset Pack

Preparing UE5 characters
Some characters will come with an UE5 ready skeleton, it will usually be labeled like that. First, locate the Skeletal Mesh you want to use.

Preparing this Skeletal Mesh is as simple as right click > Skeleton > Asign Skeleton

Type “Skel_metahuman” into the search bar and select the following skeleton
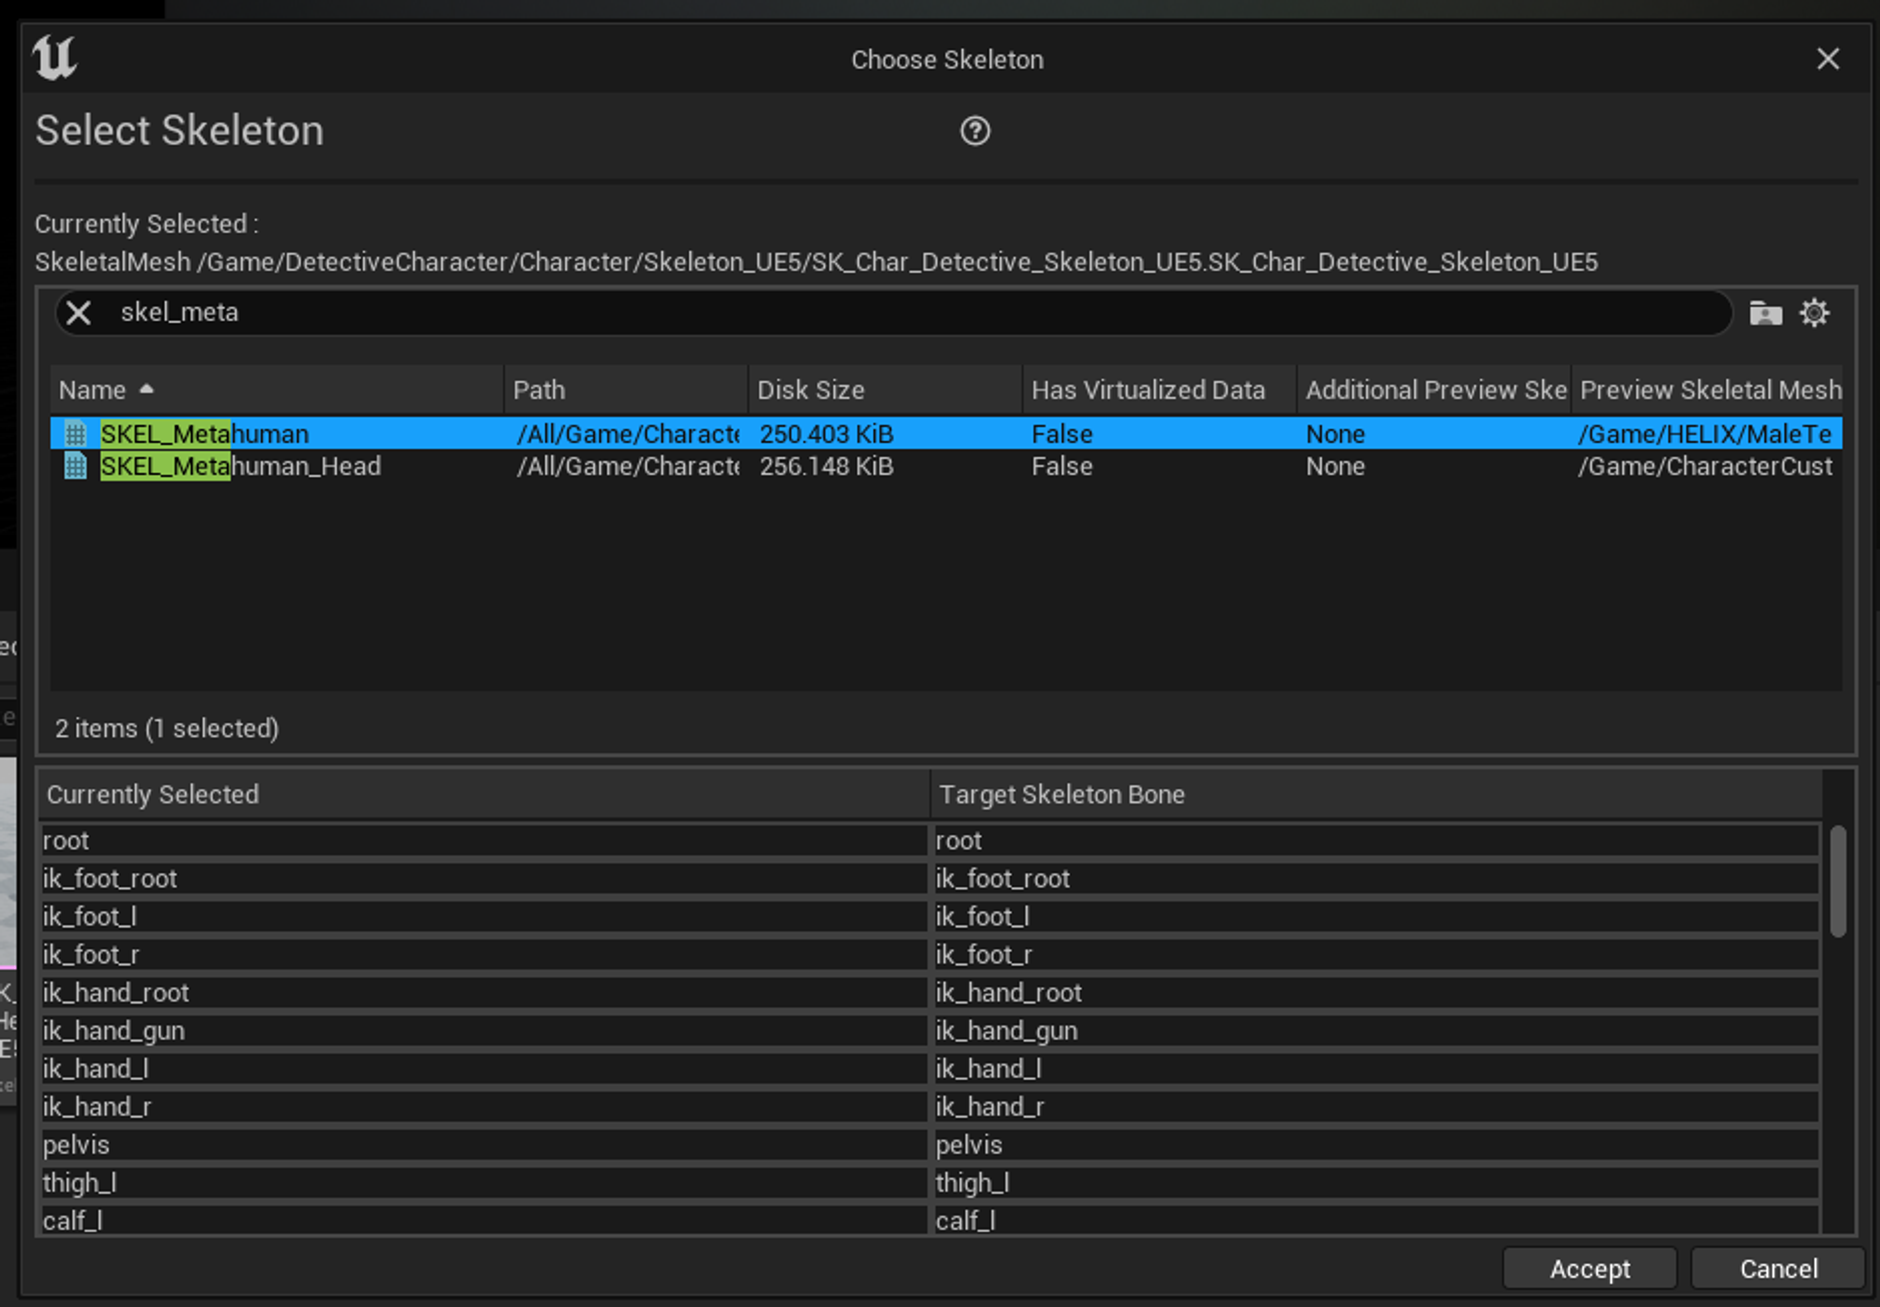
If everything went right, no warning should show, save your changes.
Here you should rename your skeletal mesh to something you recognize later, for easier testing and spawning.
Note: If a warning is shown with UE5 and UE4 skeletons, then most likely the character is using a custom skeleton that is not currentlyu compatible with Helix.
Manual Retargeting
Currently we dont support meshes that are not compatible with UE4 or UE5 skeleton. However, this functionality will exist in the future, allowing you to retarget and import any Skeletal Mesh.
Testing your Character
To be able to test your character, it needs to be inside the Asset we created before. Instead of just dragging the entire folder imported from Unreal Marketplace, is better if you migrate only the assets we are going to use, this will keep your Asset Pack slim.
Locate the Skeletal Mesh you set up befor and Right Click > Asset Actions > Migrate
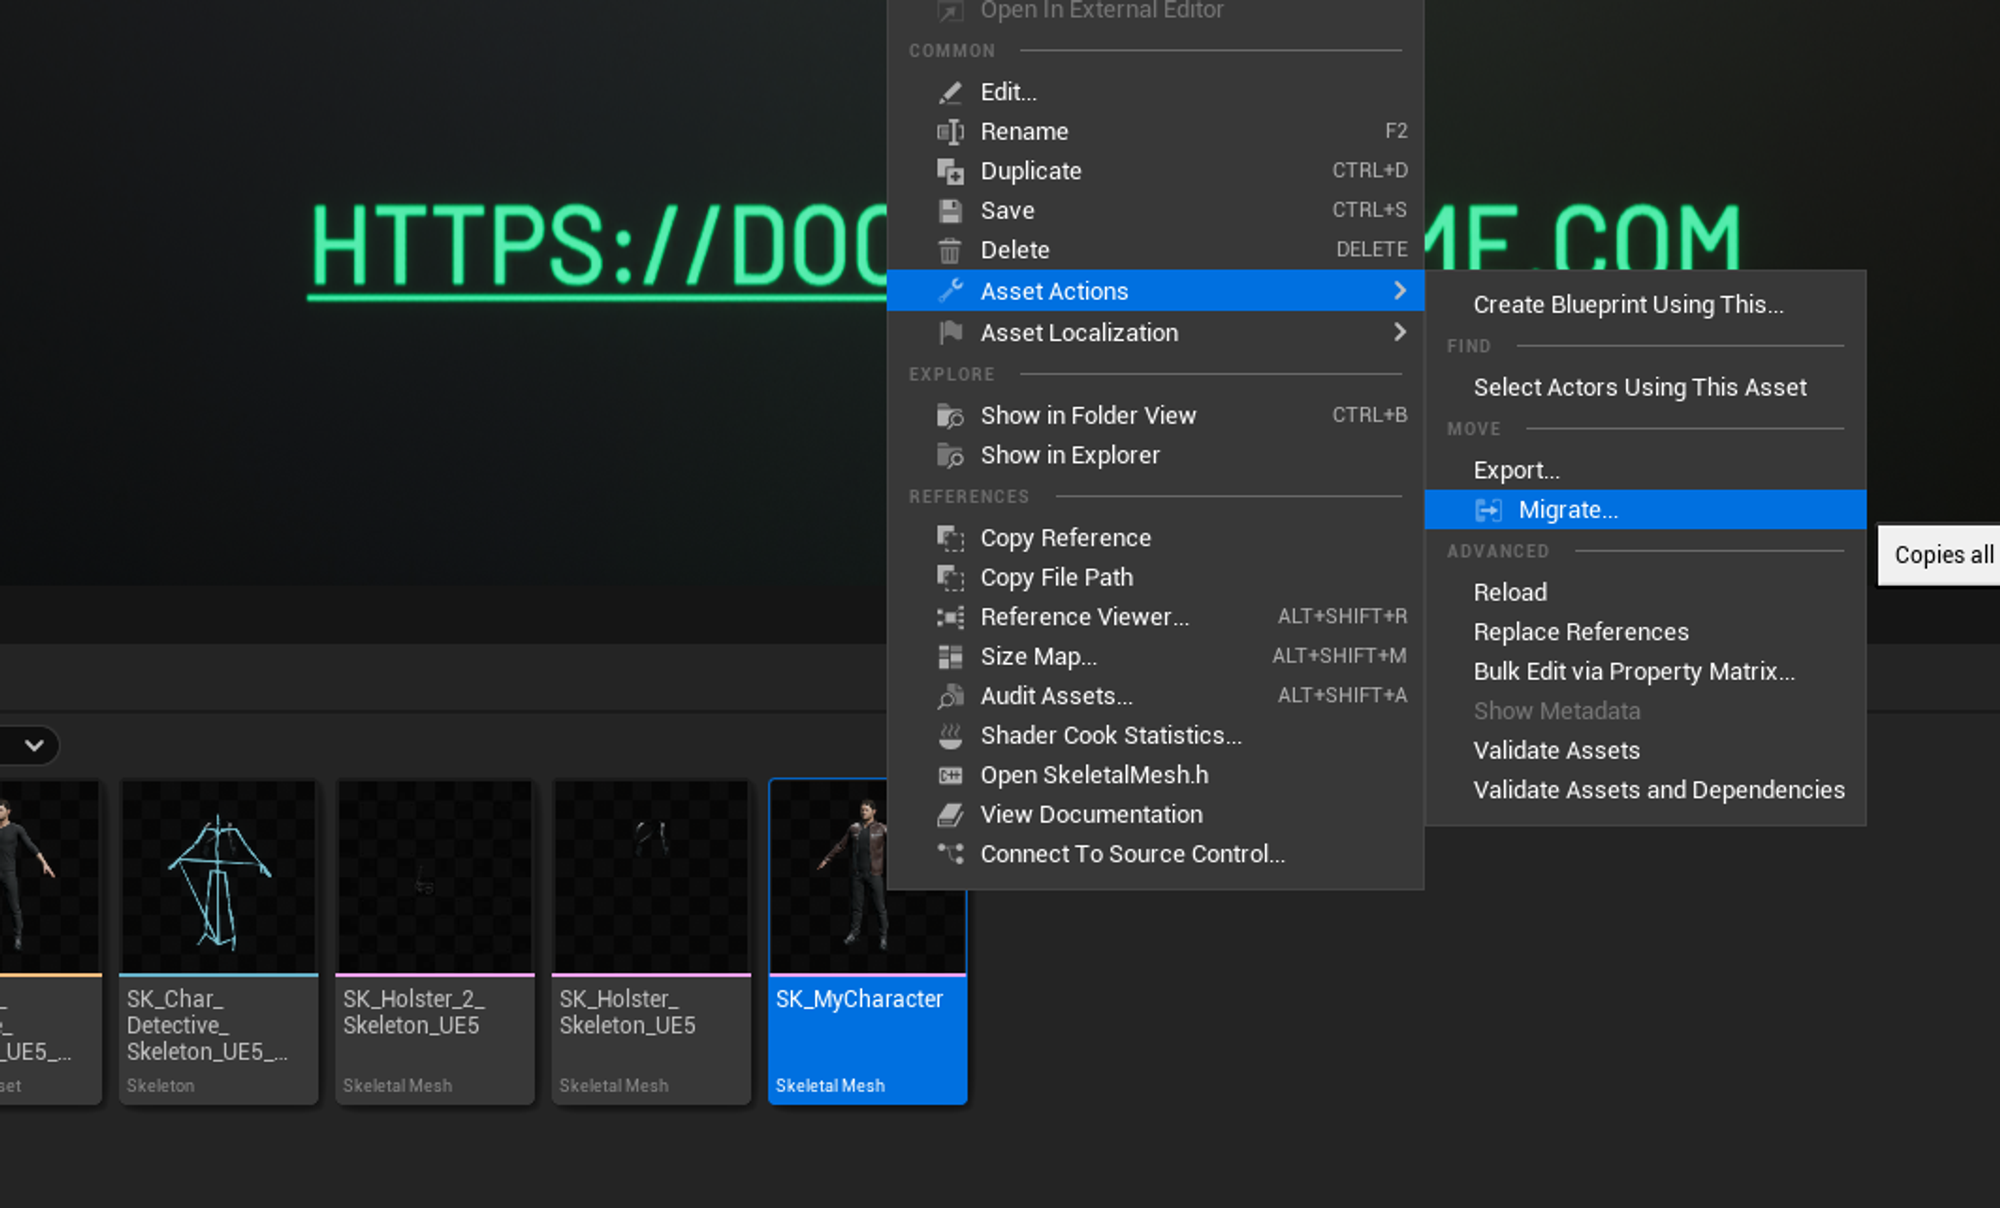
Make sure only the assets from your character are selected. This is true for most cases by default.

💡 IMPORTANT: Make sure to deselect the entire “Game” folder, if you keep this when migrating it will break the skeletons references and your character will not work on the main game.
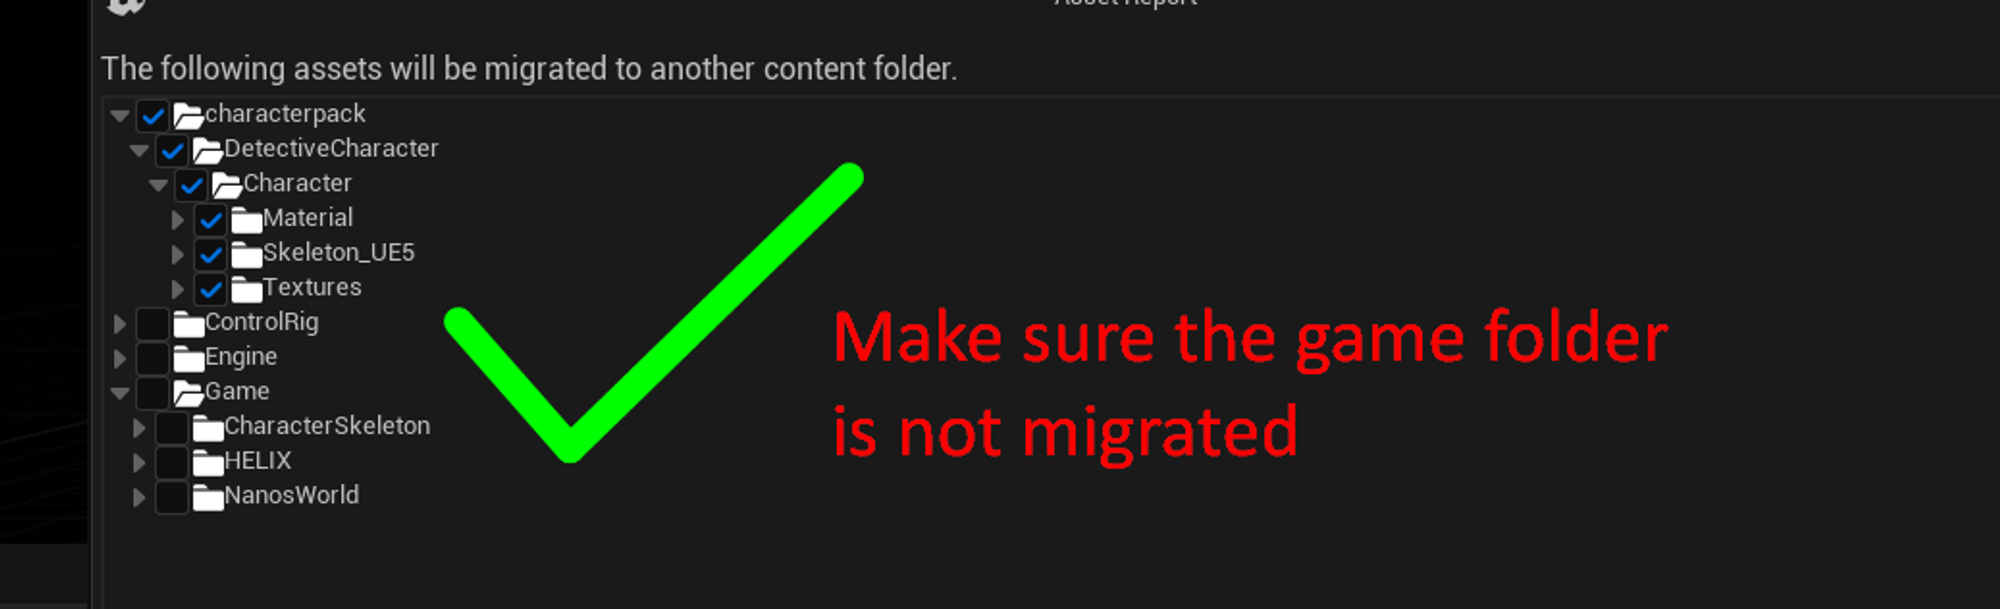
Then on the emerging window, navigate to your project MODS folder, find the asset pack you created before and select the “Content” folder. Assets can only be migrated into the Content folder of Assets Packs.

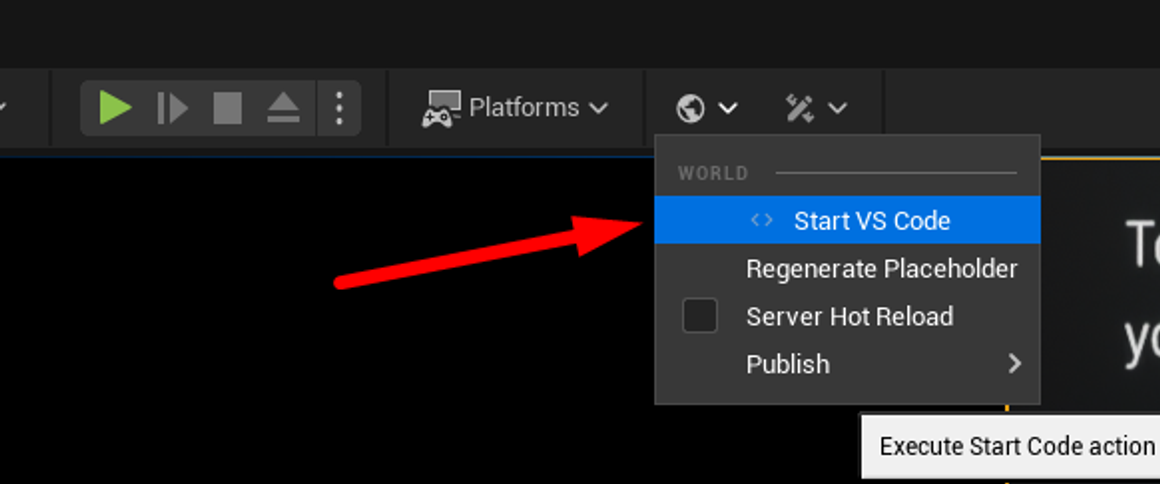
Now that you have your character on the asset pack, run the game once so files are generated. Then stop the game and click Start VS Code
Paste the following code on your Server index lua files file.
Your Package > Server > Index.lua
-- Function to spawn a Character to a player
function SpawnCharacter(player)
    Console.Log("Spawn player")
    local new_character = HCharacter(Vector(0, 0, 0), Rotator(0, 0, 0), "[your-asset-pack]::[your-asset]")
    player:Possess(new_character)
end

-- Subscribes to an Event which is triggered when Players join the server (i.e. Spawn)
Player.Subscribe("Spawn", SpawnCharacter)

-- Iterates for all already connected players and give them a Character as well
-- This will make sure you also get a Character when you reload the package
Package.Subscribe("Load", function()
    for k, player in pairs(Player.GetAll()) do
        SpawnCharacter(player)
    end
end)

-- When Player leaves the server, destroy it's Character
Player.Subscribe("Destroy", function(player)
    local character = player:GetControlledCharacter()
    if (character) then
        character:Destroy()
    end
end)
On line 4, replace the "[your-asset-pack]::[your-asset]" for the correct values. In this example we where working on the asset pack “characterpack” and I named the character “custom_ue4” so it should be replaced by “characterpack::custom_ue4”.
Then click play and whatch your character working with the HCharacter!
Creating Characters from Scratch
If you are an 3D modeler an want to create your own characters. You should start from the Meta Human skeleton.
On studio, type into the search bar “SKM_Manny”
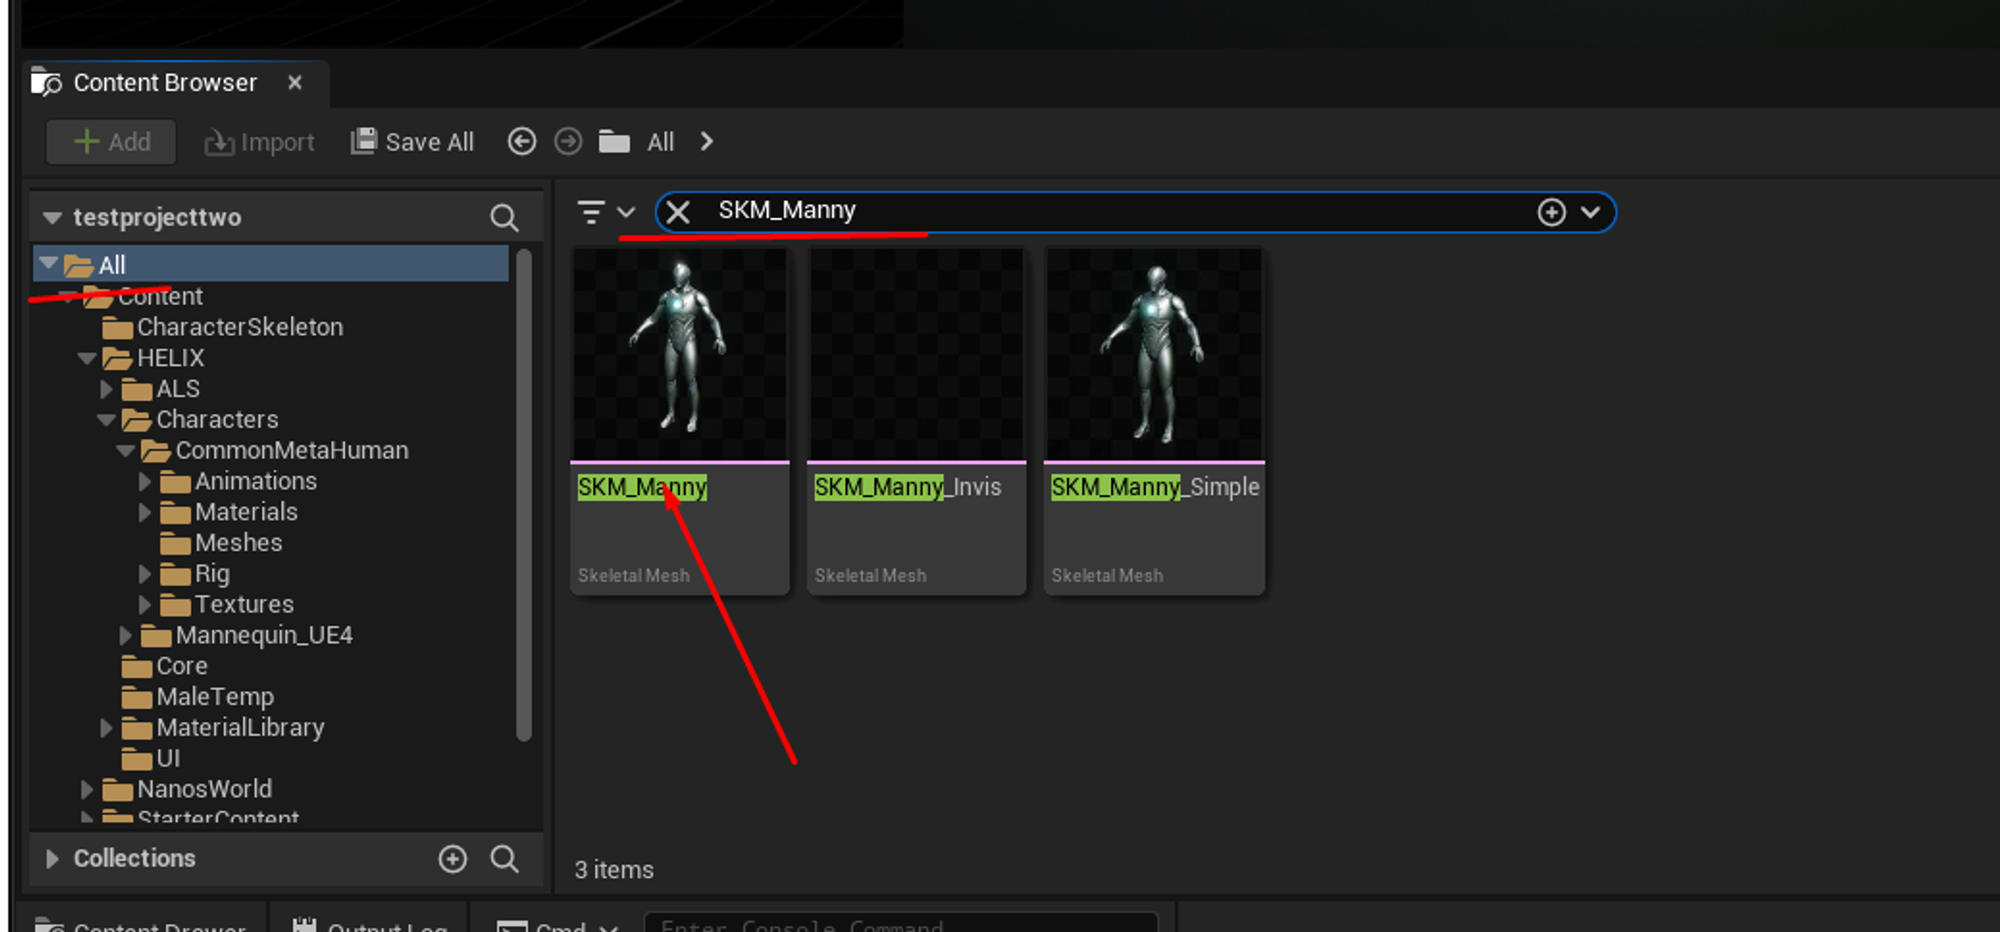
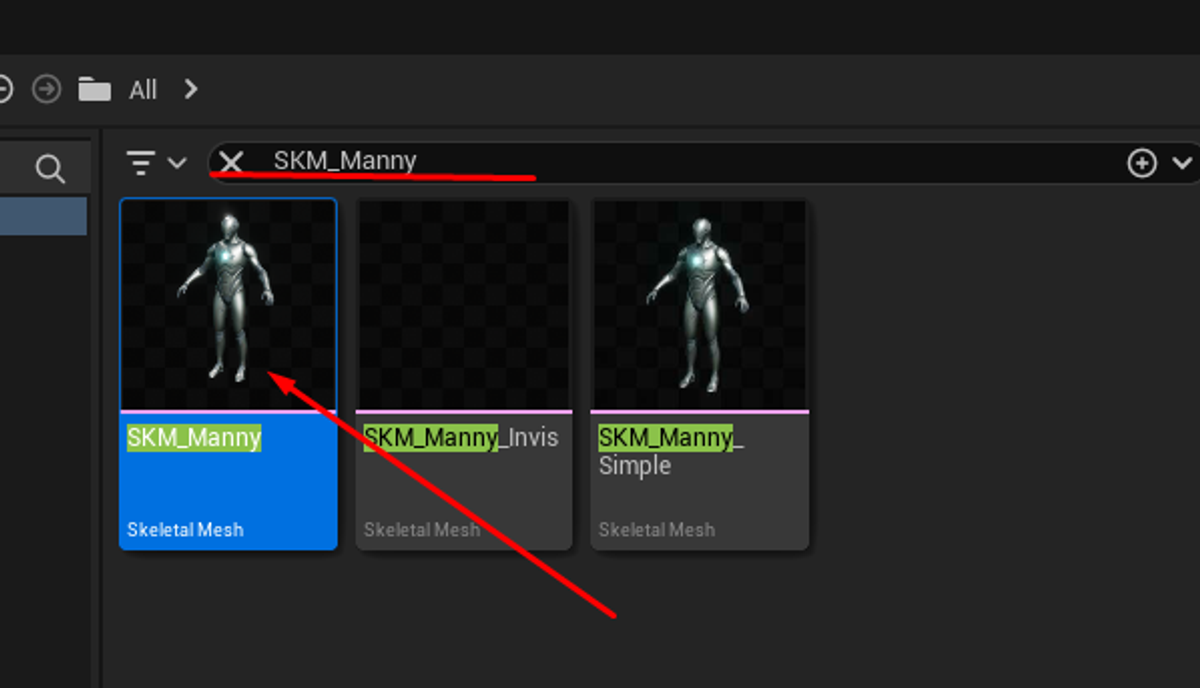
Right click it and select Asset Actions > Export
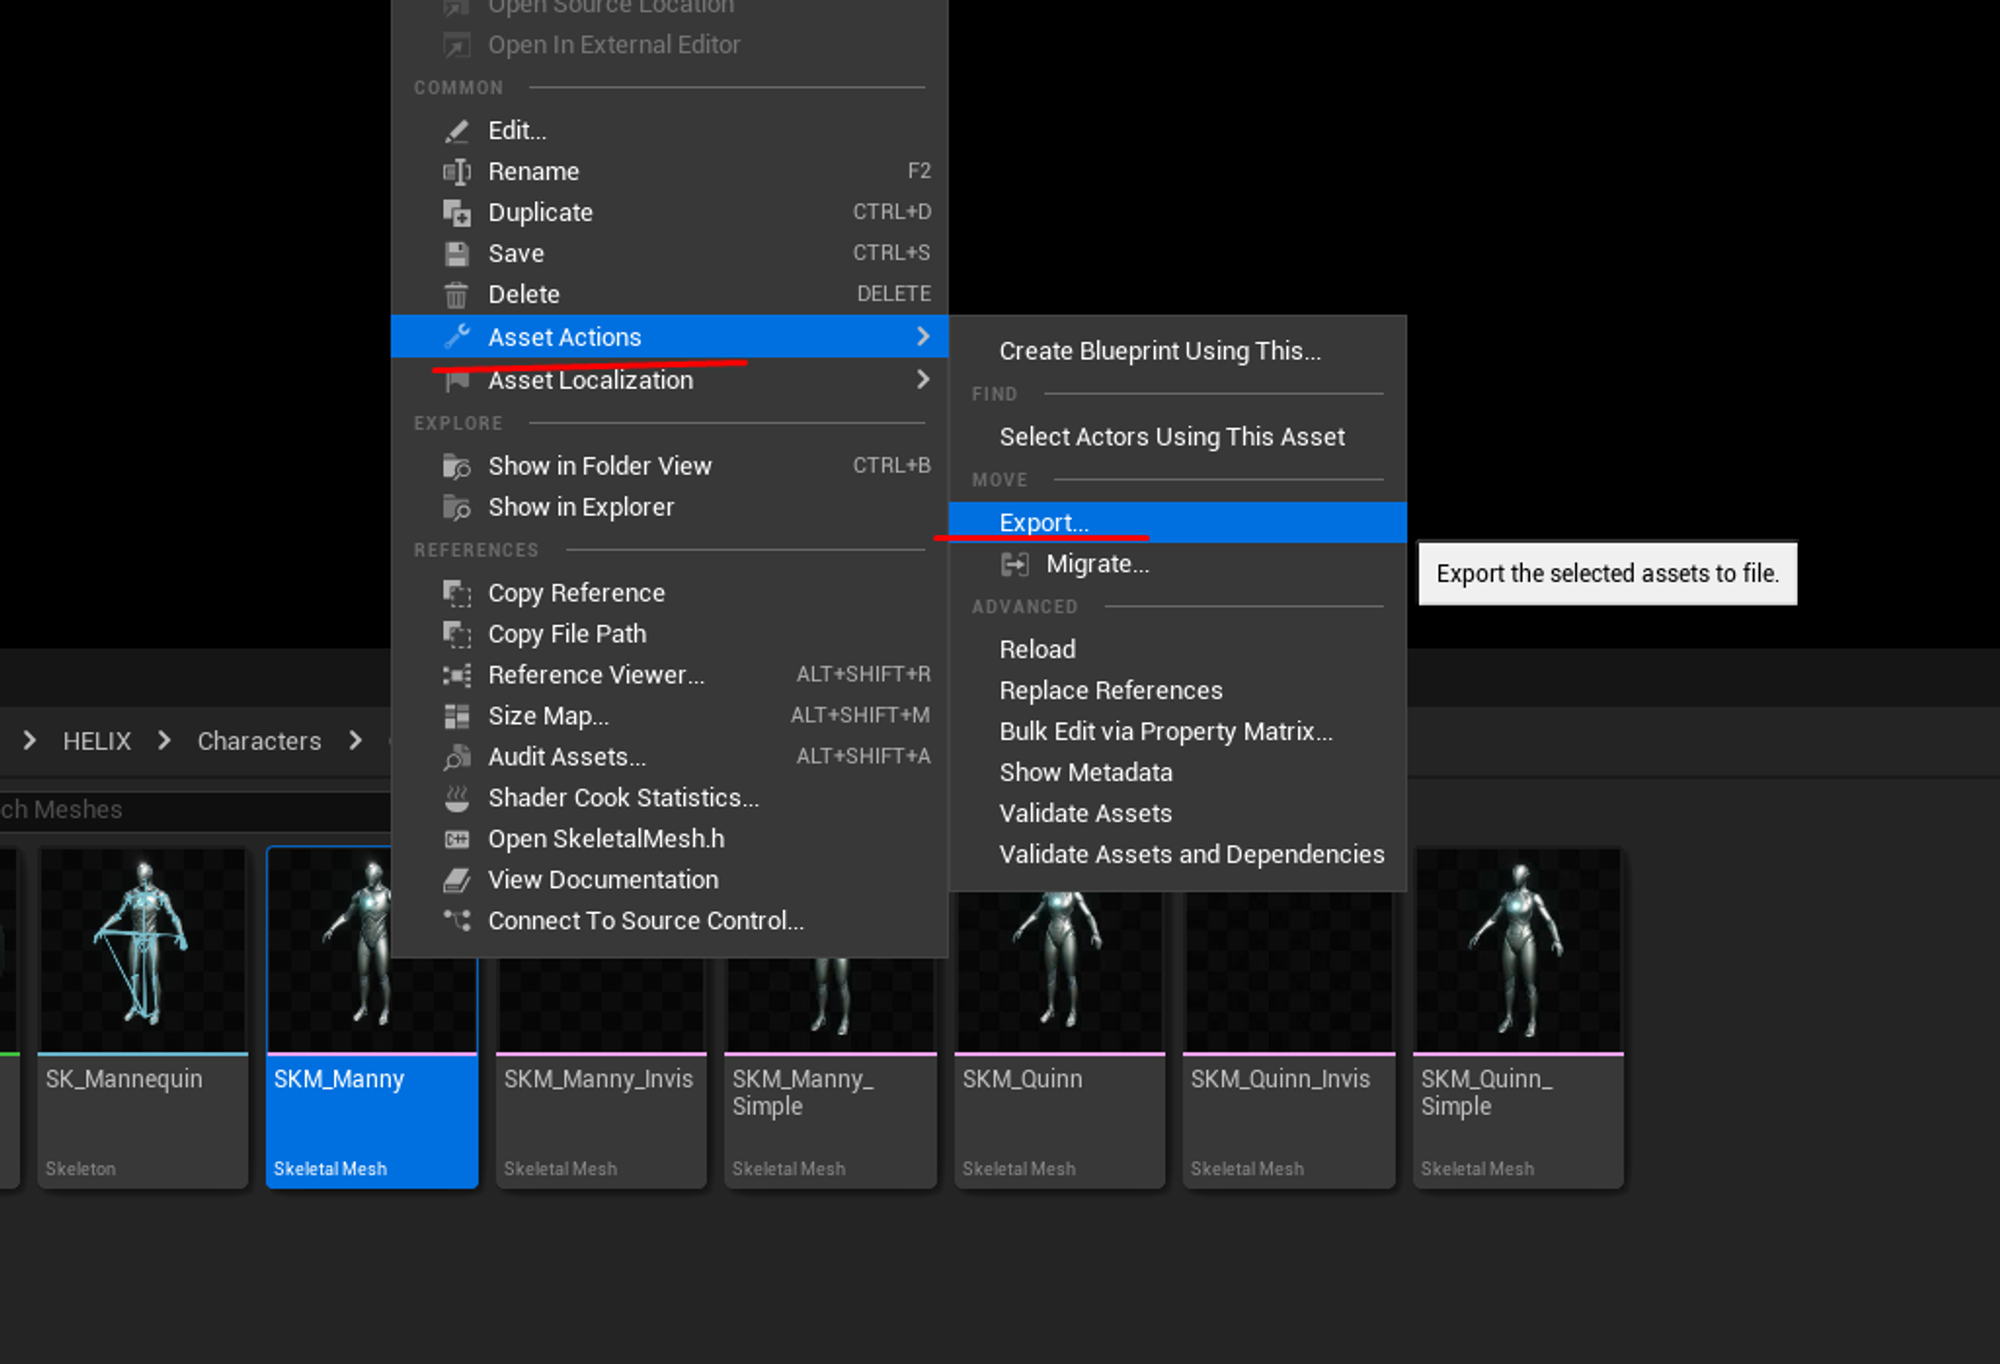
This will allow you to save a .FBX file that can be imported into any 3D software for modeling.
3D modeling is a complex topic that falls outside of this guide.
After your character is done, save your file as FBX and proced to the next step to import it. If you used the SKM_Manny skeleton, then SKel_Metahuman will be the skeleton you need to choose when importing.
Publish your animation package
Publishing your newly created Assetpack, is as simple as clicking Publish Asset and selecting your Asset Pack!
