Importing Maps
Import custom maps from the marketplace.
Create a new project with HELIX studio.
To detailed information about how to create a project using HELIX Studio, please go to Studio New Project
Importing assets from the Market Place.
Import assets from the Marketplace like buildings and items to create a map. (The selected asset in this guide contains a map with all the required assets to create a scene)
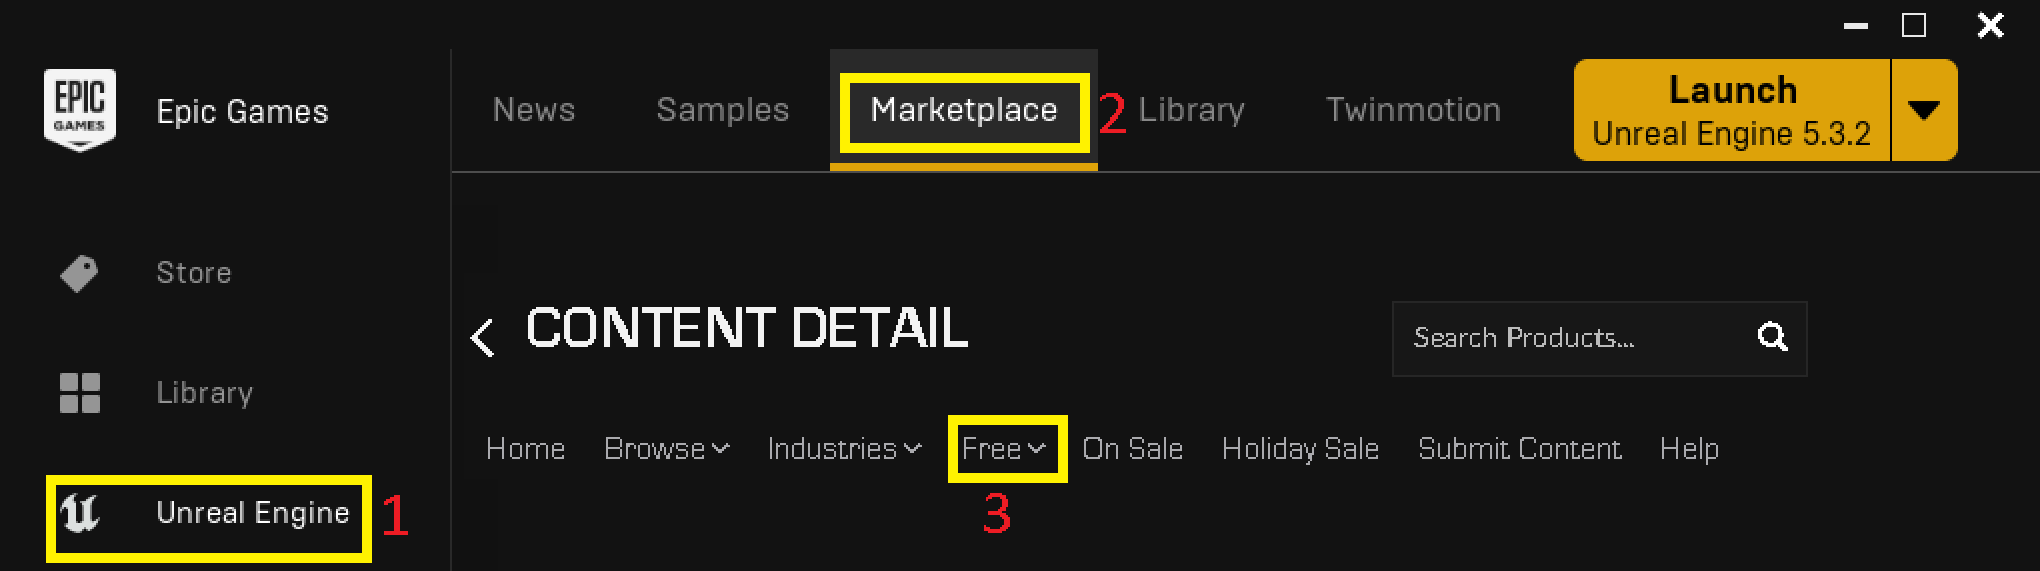
Once Studio is being executed, go back to Epic Games Launcher (if it’s closed, open it again) then click on “Unreal Engine” then click on “Marketplace” and optionally click on “free” to filter the assets shown on screen.
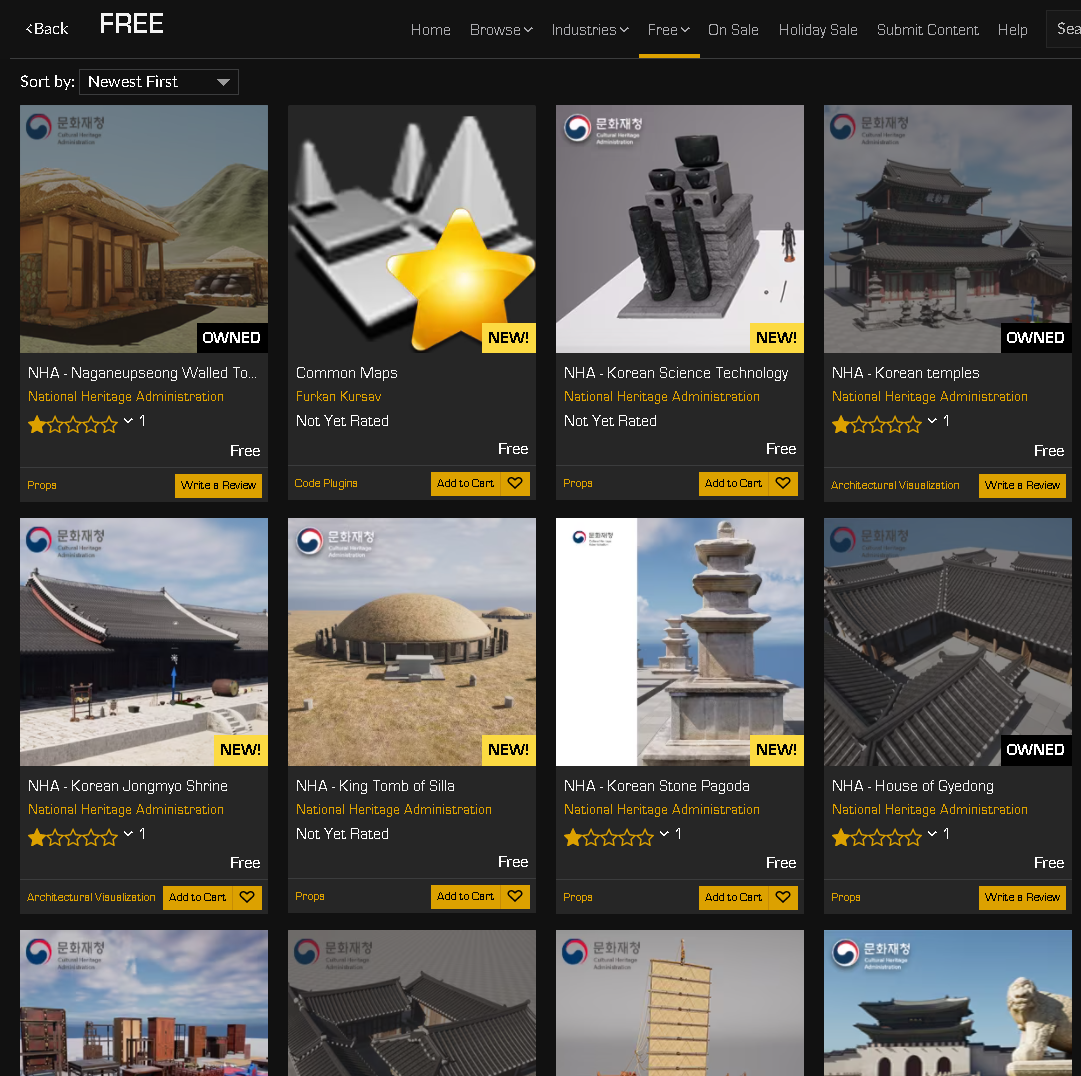
Select one asset and click on the asset to view additional details.
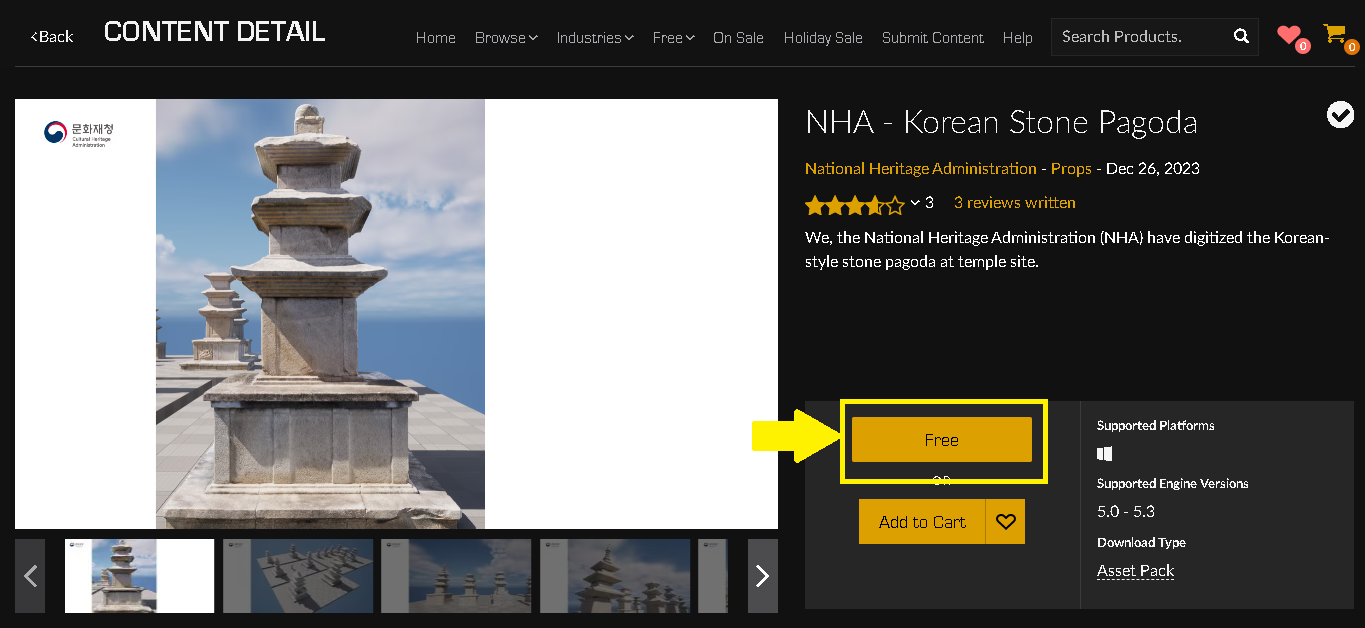
In the ‘CONTENT DETAIL” window, click on the “Free” button to get the asset.
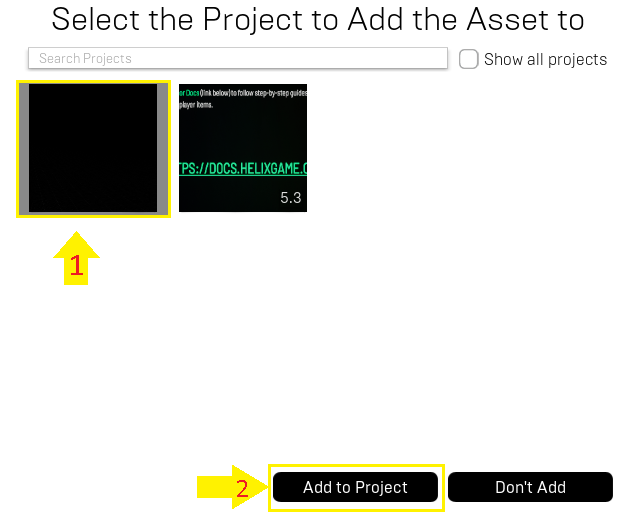
After clicking on the Free button in the previous step, it will change into “Add To Project”, click the add to project button.

This will call a new dialog box, there select the project you’re currently working on and click on the “Add to Project” button to continue, after that the assets install will began, please wait until the process completes.

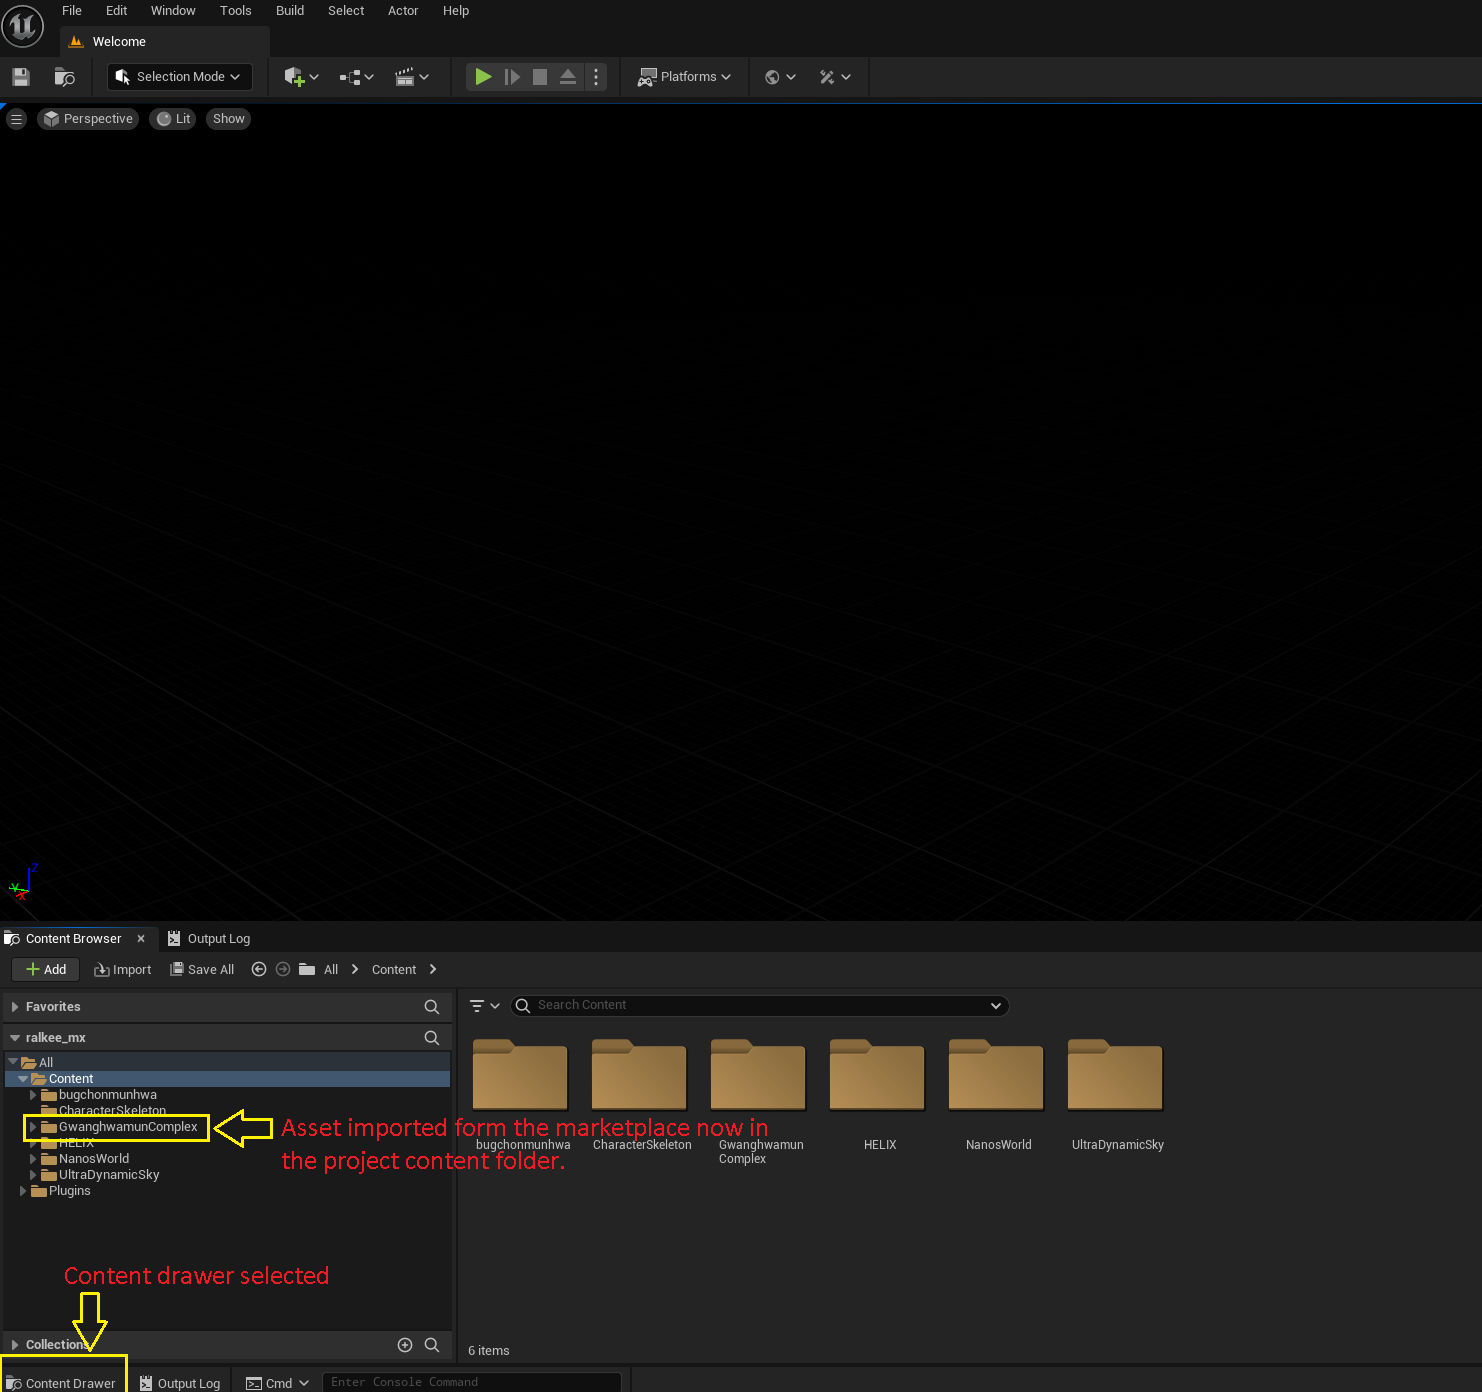
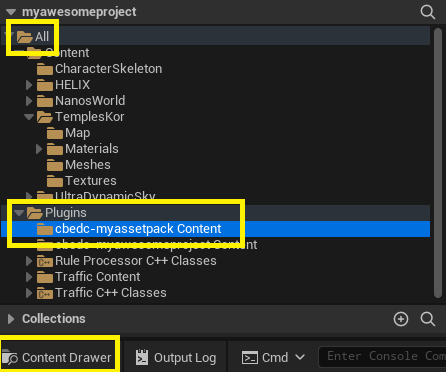
Now the asset from the Marketplace should appear inside the project’s content drawer as shown below, this concludes the asset import from the unreal marketplace.
Moving assets to HELIX Studio.
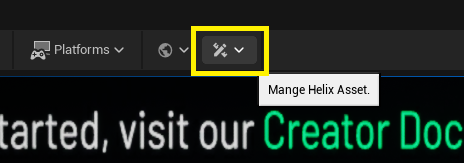
Go back to Studio in the unreal project, on the top bar click on “Manage Helix Asset” icon then click on the “New Asset Pack” option to create the pack to store assets.

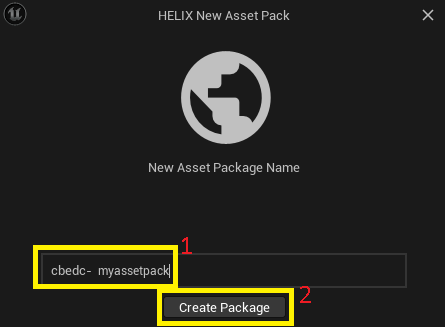
On the “HELIX New Asset Pack” dialog box, set the name for the asset pack and then click in “Create Package” the created asset pack will be inside the Content Drawer in All→Plugins→cbedc→[asset_pack_name] and this will create the folder where the downloaded asset from the Marketplace is going to be moved.
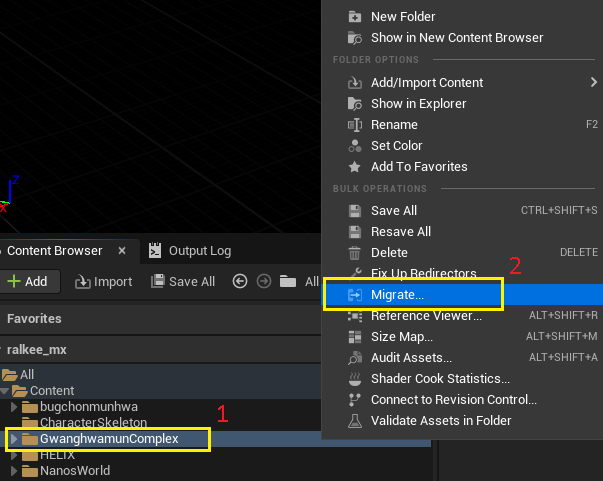
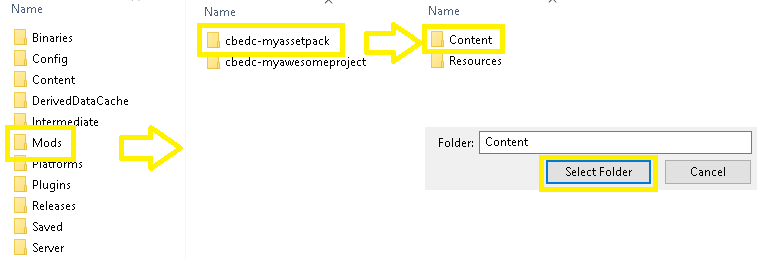
So, in order to use the asset with HELIX Studio, an asset migration should be carried out by doing a right click on the asset to import ant then selecting “Migrate…”
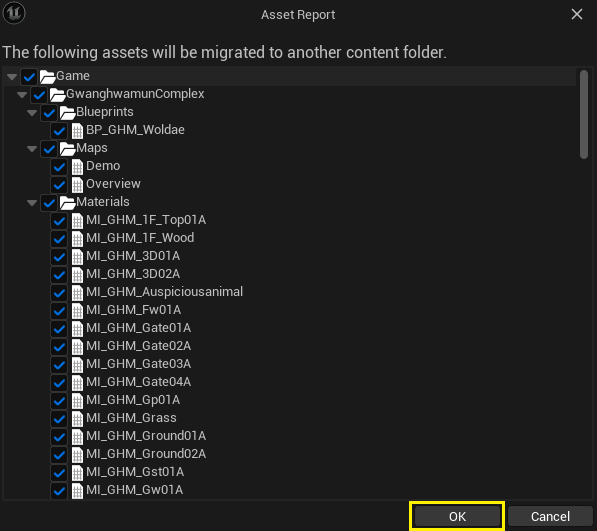
The Asset Report dialog will be shown, verify only the desired assets are selected and then click on “OK” to continue, after this a dialog box will appear to select the folder in which to migrate the assets.
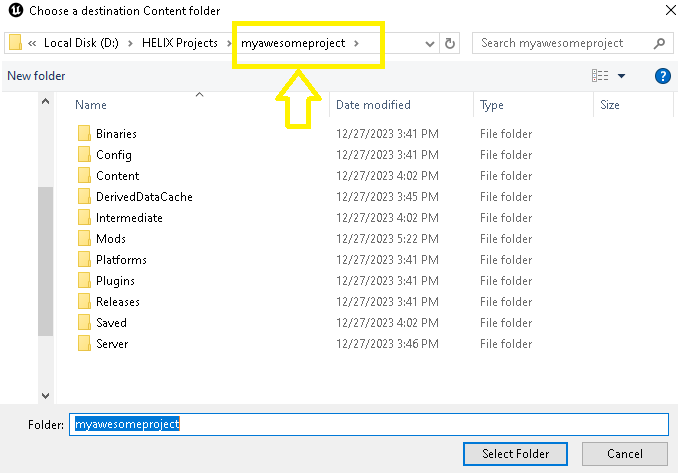
Browse back to the root folder and then go to Mods→[project_name] folder→Content and click on “Select Folder”
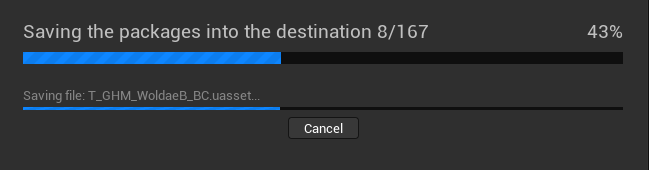
And then the asset migration will start, please wait for this process to complete.
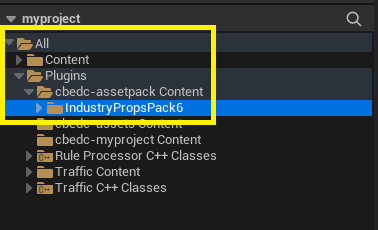
After migration, the asset will be shown in the content drawer on All→Plugins→[asset_folder_name]
Setup Config.toml file
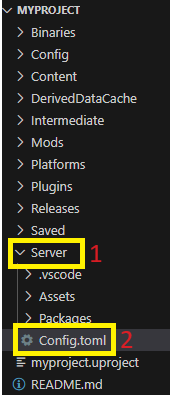
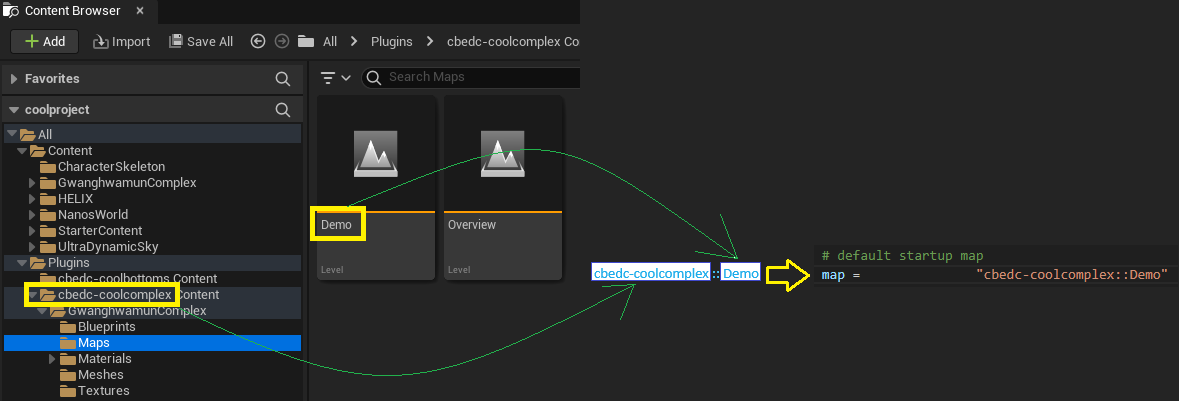
To load the map downloaded from the Marketplace in the studio, add the map name in the Config.toml file. The name of the map must be defined in the Config.toml file, this is a configuration file for the server where the world is going to be running. To do this, click on the “Manage Helix World” icon and then click in “Start VS code”

After Visual Studio Code opens, navigate to “Server” folder and inside there will be the Config.toml file, double click on Config.toml to edit it.
The Config.toml file is divided by sections with configurations, inside the section [world] there’s a map variable with the current map assigned, by default the Blank map will be assigned but can be changed for a different one.

To change the map and assign another one, the values must be in the form of:
[assetpack folder]::[map name] ⇒ cbedc-assetpack::Demo
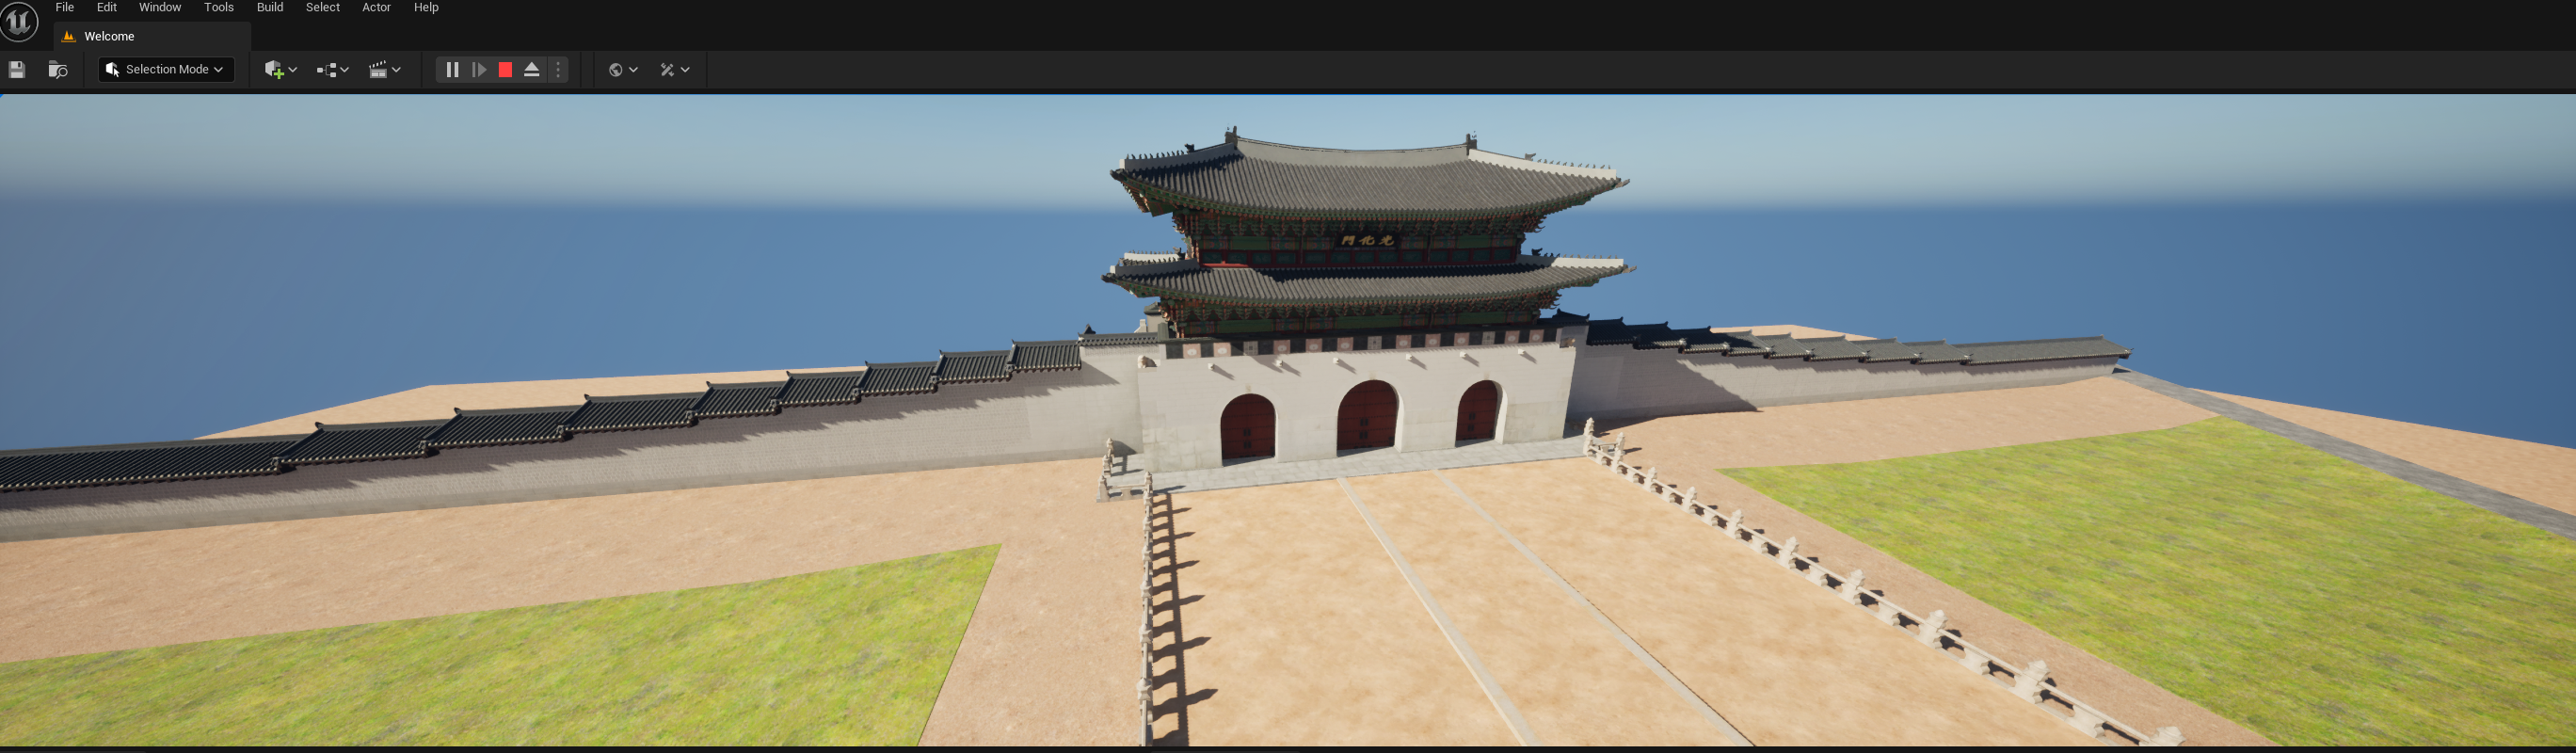
Play the level to load the map.
On the toolbar at the top of the editor, click on play and then the map will be loaded and displayed on screen.

💡 Note: Different maps can be loaded (on at a time) by modifying the Config.toml file
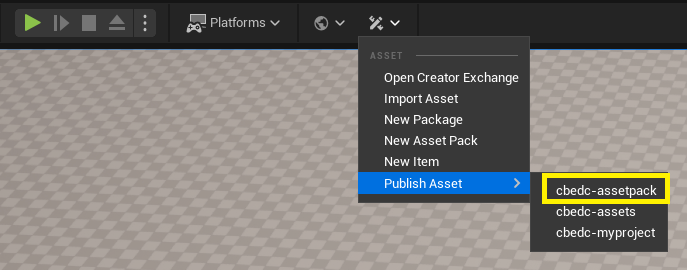
Publish the map as an asset.
Next step is to upload the asset to the HELIX Hub so others can see it or to be able to use it through the exchange creator.
On the tool bar at the top, click on the Asset Icon and then go to “Publish Asset” option to display the asset packs available. Select the asset pack containing the map created in prior steps.
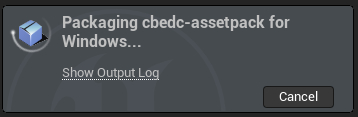
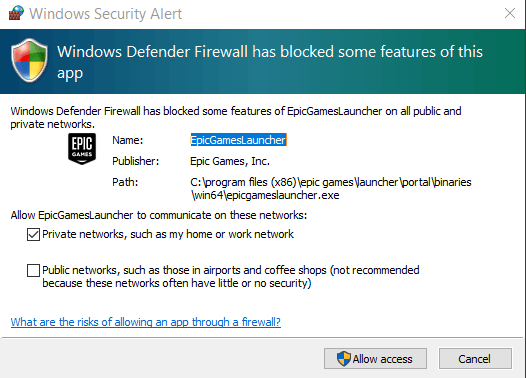
After clicking on the asset pack containing the map, a message will appear in the corner of the screen indicating the files are being processed (In this step if there are windows dialog boxes related to the firewall, click on “Allow access”)
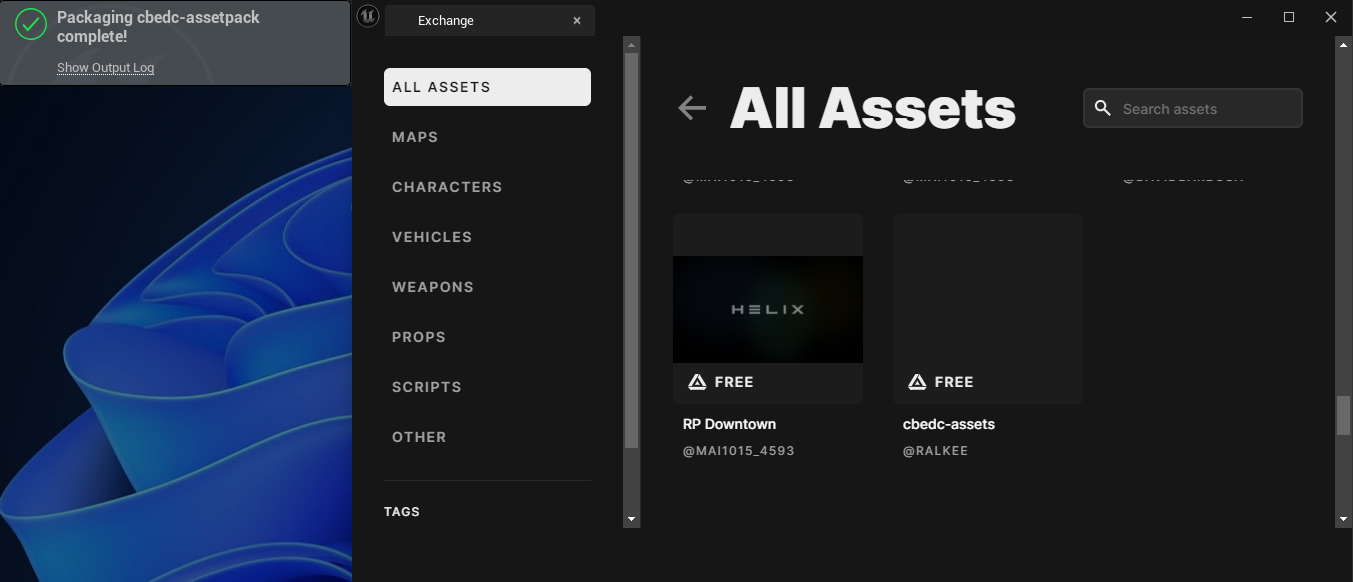
After all assets are processed a message will appear, and the asset will be visible in the asset exchange. Now the asset pack can be accessed via HELIX Hub.
Edit asset information
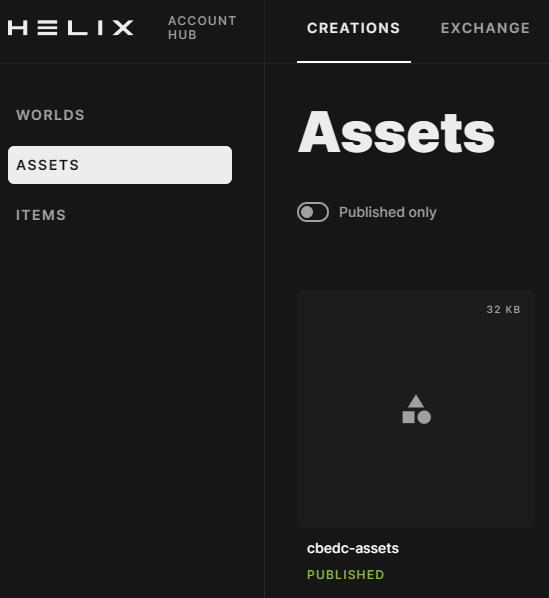
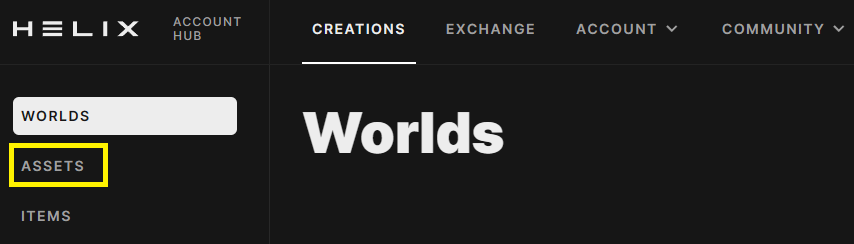
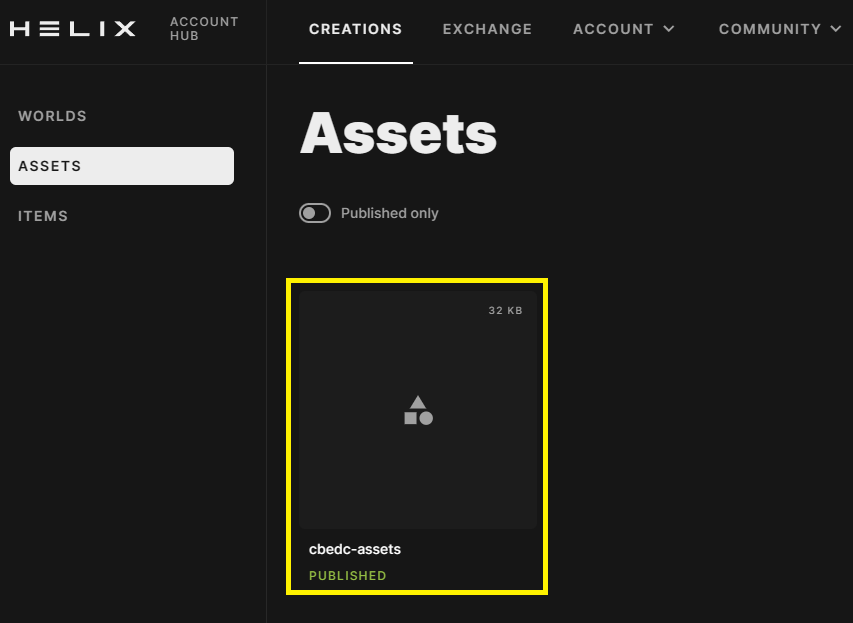
By default the assets doesn’t have any information or descriptions. In order to change this, log into the HELIX hub at https://hub.helixgame.com/ after login, the default page will be the WORLDS section, click in “Assets” to access the uploaded map created before and inside the asset section, the uploaded asset will be displayed, click on that asset to see its details.
In the Asset details page, there is default information regarding the asset but can be changed by clicking in the text fields there.
Text to change includes:
Display name - This text corresponds to the text that will be shown in the Asset Exchange and in other HELIX Hub areas.

Description - This field is to give an extended information related the asset.

Category - In this dropdown menu, select the category to which the asset belongs to. In this case, the category is “Map”

Tags - Here, you can define tags so the asset can be searched y using the search boxes in HELIX Hub

Click on “SAVE & CLOSE” when the edit to the details are completed.

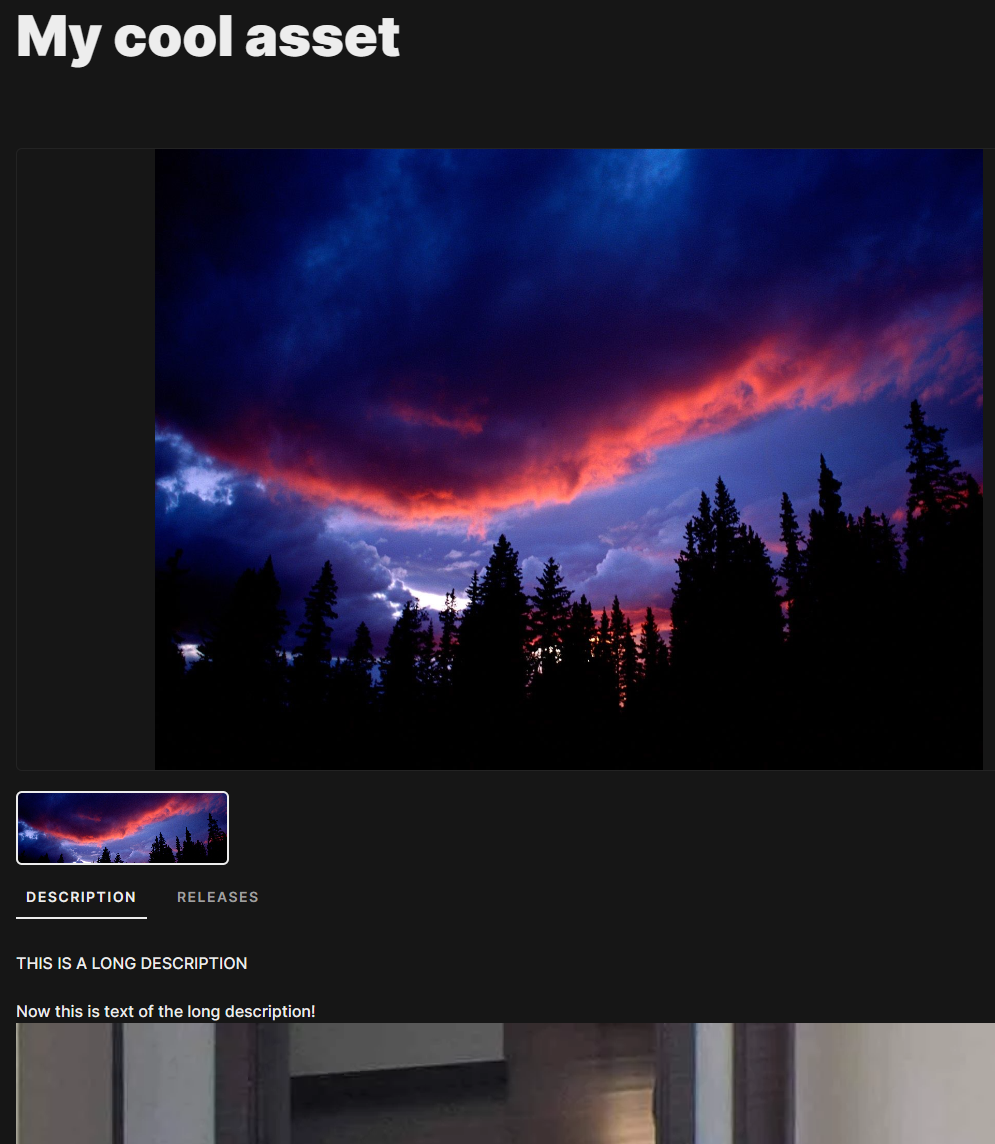
Aside of that basic information for the asset, additional information can be set in Showcase.
In the Icon section of the SHOWCASE page, an icon can be uploaded to represent your asset.

Previews of the asset can be uploaded via images or via youtube links.

A longer description can be added to the asset with the aid of the advanced text editor included in the “Long description” section. By using this simple text editor additional styles can be used.

Click on “SAVE & CLOSE” when all the changes are completed.
Information Edit completed.
The new information edited for the asset will be shown in the asset exchange and in the HELIX Hub available to use